Introduction
If you’ve been online these last few days, you’ve very probably heard about China’s new LLM model, Deepseek.
Often depicted as ChatGPT’s killer, Deepseek sent shockwaves through the internet not only for its performance and cost but also for the fact that the model is open-source. This means that anyone can run the model on their computer for themselves.
With that being said, we’ll see how to run our own Deepseek R1 distilled model using Ollama for ourselves along with Open WebUI in a single Docker compose project ! 🐳
But first let me introduce you to the programs we’ll use.
What is all of this ?
If all of these names scare you 👻, don’t worry this section will explain everything !
Docker 🐋
Docker is a platform designed to help developers package, ship, and run their applications within isolated environments known as containers. These containers are lightweight and portable, ensuring that your application functions consistently across various systems or platforms.
Docker compose
Docker compose is a tool proposed by Docker to help manage multi-container applications. All we need is a single file often named docker-compose.yaml or compose.yaml that specifies what container we want and how they interact with each other.
For example, if we have a simple containerized website that only has 2 containers :
- the database
- and the website itself
We’ll want our database and website to communicate with each other and we’ll also want our database to start before our website. All of this (and more) can be controlled with Docker compose.
Ollama 🦙
Ollama is an open-source tool designed to help you run LLMs locally. From it you can download and run various open-source models.
Open WebUI
Open WebUI is an open-source graphical user interface (GUI) for LLMs. It’ll allow us to have a nice web interface just like ChatGPT’s but open-source and self-hosted ! 😎
Tutorial
Phew 😮💨 that was a lot of talk. Let’s get to the fun part and actually run this model !
1. Pull the repository from Github
Within a terminal run :
git clone https://github.com/doge0420/docker-compose-ollama-openwebui.git
To get the files you’ll need to for the whole project. After that go into the folder with :
cd docker-compose-ollama-openwebui
2. Run the Docker compose project
Inside the folder type in :
docker compose up -d
It’ll then start to download Ollama and Open WebUI and run the containers. You are almost there 🤩.
3. Install Deepseek R1 (or others)
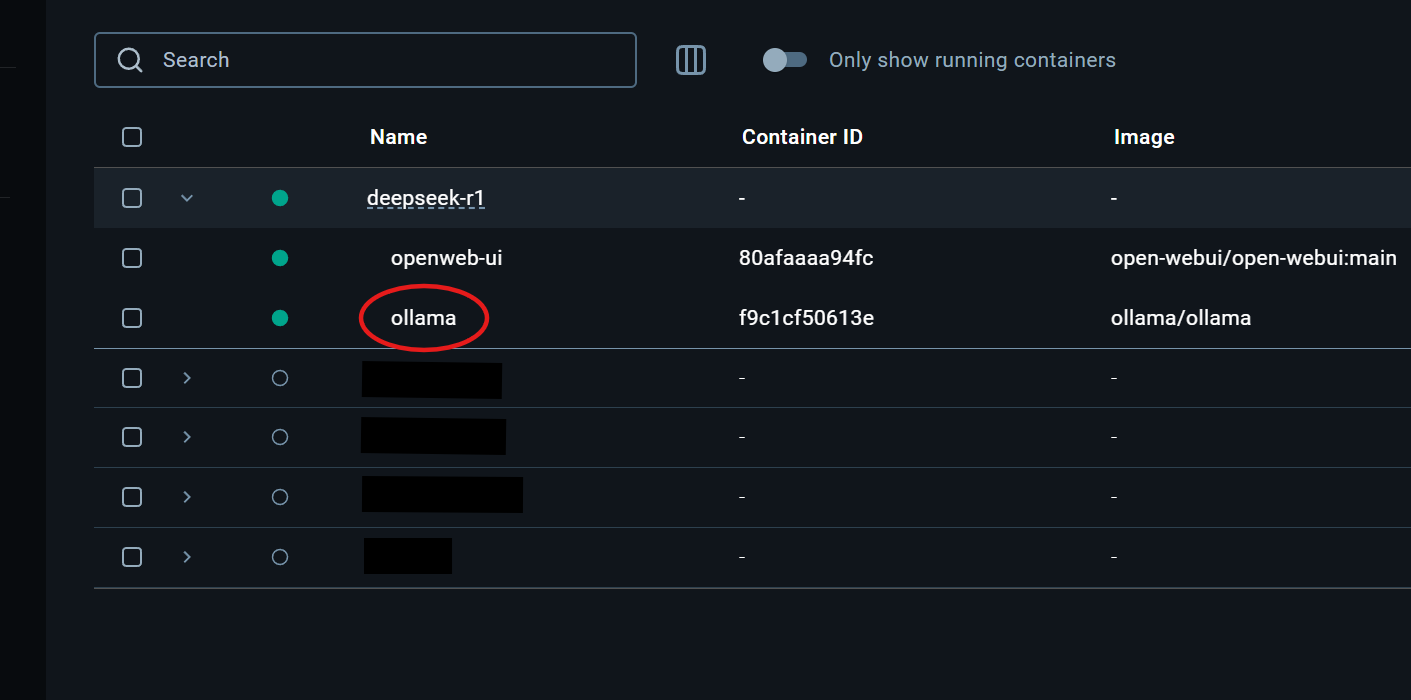
Once everything is running you’re gonna want to click on the ollama container on Docker Desktop :
And inside the ollama container click on the Exec tab :
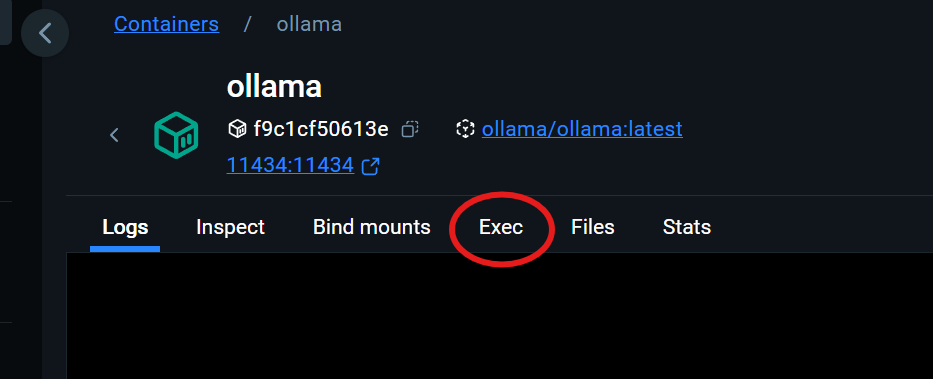
If you have a Docker account, you’ll be greeted by a terminal from inside the ollama container. In it, type in one of the commands from the table below. This will download the Deepseek R1 distilled model with the choosen amount of parameters.
Parameters can be thought of as the level of sophistication of the model the more you have the “smarter” it will be. But on the other hand, more parameters means that the model will be bigger in size and increasingly more computationaly heavy. Therefore it is up to you to choose the right number of parameters that your machine can handle.
If your machine is less beefy then consider installing the version 1.5b, 7b or 8b. On the other hand if you have a beast then consider installing the 14b, 32b or 70b variance 😉.
You can always delete a model with this command ollama rm <model-name>.
| Parameters (billion) | Command to run |
|---|---|
| 1.5b | ollama pull deepseek-r1:1.5b |
| 7b | ollama pull deepseek-r1:7b |
| 8b | ollama pull deepseek-r1:8b |
| 14b | ollama pull deepseek-r1:14b |
| 32b | ollama pull deepseek-r1:32b |
| 70b | ollama pull deepseek-r1:70b |
By the same token, you can also download other open-source models that are listed on Ollama’s website.
4. Connect to Open WebUI
Once everything is sorted you can go ahead and type in your browser’s search bar http://localhost:3000 (or directly click on the link 😉). You should then be greeted by Open WebUI asking you to create an account.
5. Test out the model(s) 🔥
After creating an account, you’ll arrive on an interface which should look very familiar to ChatGPT’s. You can then select which model you want to prompt from the bar on the top.
Once this is done, you’re set ! Enjoy your LLMs for free with unmatched privacy ! 🔥